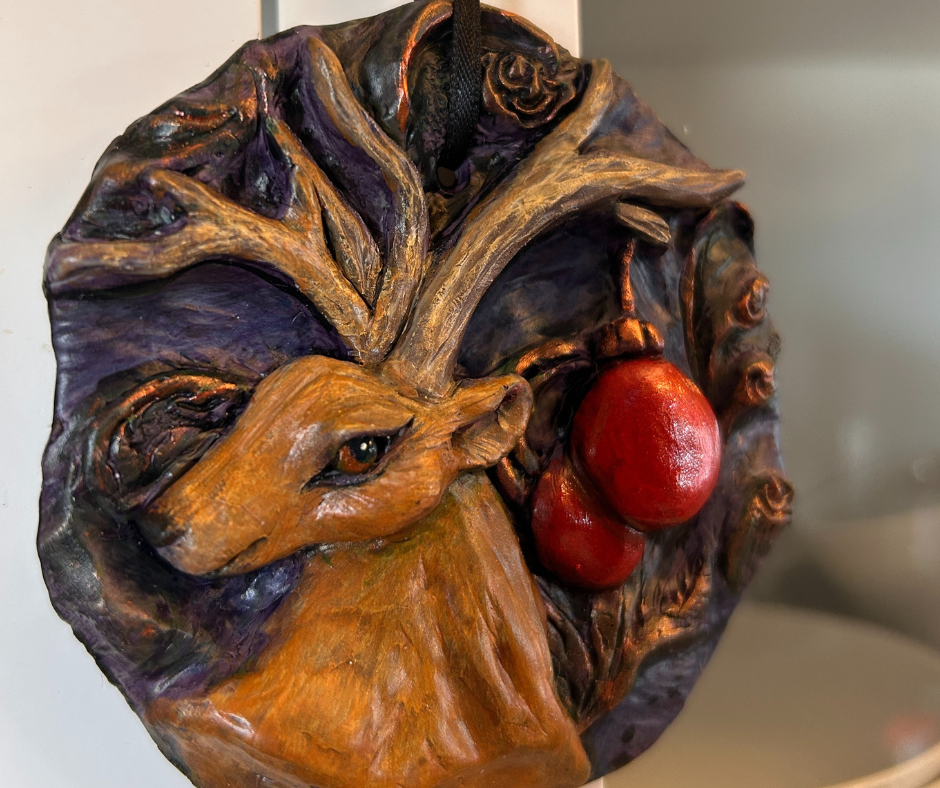
Homemade Keepsake Ornaments for my Family

Every Christmas season, I make about 20 handcrafted ornaments to give to my family and friends as gifts. They are a labor of love for sure! Now that January is here I can show you my 2024 ornaments without spoiling the surprise. I choose an “enchanted deer” theme. Below is a glimpse at what went into making my 2024 gifts.
Making the Ornaments
I started the process in October and finished the week before Christmas. If you are looking for a fast and easy project…look away LOL.
Polymer Clay Sculpting
I spent several hours sculpting the first deer from Super Sculpey® Gray Polymer Clay. This is a switch up for me. I usually create with colored clays especially transparent clays like Premo Sculpey or Cernit, but I decided to paint the ornaments this year and make a silicone mold of that first ornament to speed up my process somewhat.
Mold Making
After my sample ornament was cured I used Silicone Plastique DIY Silicone Mold Making Kit to create a custom mold. I really loved this brand by Marvelous Molds because it is easy to use and captures fine details but unfortunately the owner retired and closed his store.
The mold gave me a quicker starting point for the rest of the ornaments. Still, even using the mold, I like to clean up the finishing sculpting and add details to each individual ornament so they aren’t identical.
Final touches: I baked the unpainted polymer clay pieces in my home oven at 275 degrees for 45 minutes. I use an old square cake pan with a ceramic tile laid on the bottom. Once they were completely cool, I drilled the holes using a handheld pin-hole drill and gave everything a light sanding.
Batch 1
I divided the work into two “batches” with the first batch ready earlier for postal delivery.
Base painting: I started with a medium light gray blue/black acrylic base coat which I’m calling the “oreo” layer. My thought was that it would add some contrast to the final piece. Next I dry brushed a pale yellow color over the deer ‘s body and antlers as an underpainting.
Glazing: The color went on through several layers of acrylic glazing. To be honest, I’ve never really liked the way acrylic paint sits on top of my polymer clay sculptures, but discovering Golden Glazing Liquid has been a game changer. I can add it to my acrylics and It increases the transparency of the paint while slowing down the drying time to allow for more subtle blending. For the most part I used high-quality artist-grade acrylics (Winsor Newton Galleria, Golden, Liquitex, and Blick) with a few cheaper Liquitex Basic colors mixed in. The key was working in thin layers and letting them dry completely between coats. I didn’t keep track of how many layers I added but it was between 4-6. Then multiple layers of acrylic glazing went on to bring the scene to life.
Varnish: I used to different sealers to finish off the ornaments. For the eyes and the red ornaments, I added a high gloss finish: CrystaLac Brite Tone Clear Gloss. For everything else I used Final Coat in a semi-gloss. Both of these brands have tested well with acrylic paint and polymer clay. You have to be really careful what finish you use on polymer because it can turn sticky.
Batch 2
For the second batch, I pulled out my favorite rubber stamp to add more swirl details to clay deer. I also decided to experiment with a simple dark purple basecoat instead of the two-tone effect. The rest of the process was the same as in batch 1,
Yes, these beauties are a time commitment but the results are worth it. I even made one for myself!
